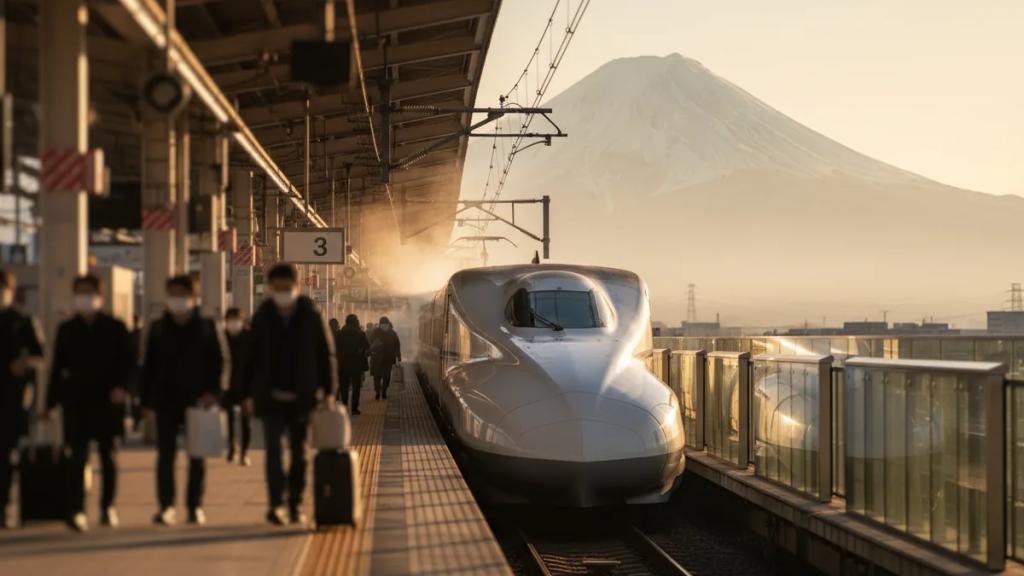
The most reliable way to get internet on the Shinkansen is a Japan eSIM, starting at €2.07, which keeps you online through the mobile networks that run alongside the entire route. The bullet train follows Japan's most densely populated corridors - Tokyo, Nagoya, Kyoto, Osaka, Hiroshima, Fukuoka - and those corridors have some of the best 4G and 5G coverage on the planet. Your eSIM connects to a major Japanese network (such as NTT Docomo, SoftBank, or au) the same way it does when you are standing still, so you stay online at 300 km/h.
The honest caveat, which most guides skip: no connection on a moving bullet train is perfectly stable. You will get brief drops in tunnels, and the free onboard Wi-Fi is slower than you hope. This guide tells you exactly what to expect and how to set yourself up so a two-hour ride between cities is productive instead of frustrating.
The Two Ways to Get Online on the Shinkansen
There are only two realistic options, and they are not equal.
Free onboard Wi-Fi (Shinkansen Free Wi-Fi). Most major lines now carry it - the Tokaido, Sanyo, and Kyushu Shinkansen between Tokyo and Kagoshima, plus the Tohoku, Hokuriku, and Joetsu lines heading north. You connect to a network like "Shinkansen_Free_Wi-Fi," open a browser, and agree to the terms. It is genuinely free and fine for checking a map or sending a message. But it is backhauled over trackside cellular networks and shared across a whole train of passengers, so it is slow, it often caps sessions at around 30 minutes (you just reconnect), and it struggles with anything heavy like video calls or uploading photos.
Your own eSIM data. This is the connection that actually carries your work. Because the eSIM rides the same ground-based mobile networks the train passes, speeds are far closer to normal city 4G/5G than the shared Wi-Fi will ever be. You control it, it does not time out, and it works the moment you board - no captive portal, no reconnecting every half hour.
The right move is to use both: eSIM as your real connection, free Wi-Fi as a backup for light tasks so you conserve data.
Japan eSIM Plans and Pricing
| Data | Duration | Price |
|---|---|---|
| 1GB Data | 7 Days | €2.07 |
| 3GB Data | 15 Days | €5.11 |
| 5GB Data | 30 Days | €7.08 |
| 10GB Data | 30 Days | €11.80 |
| 20GB Data | 30 Days | €19.67 |
| 50GB Data | 30 Days | €30.40 |
| 1 Day | 1 Day | €3.07 |
| 2 Days | 2 Days | €6.14 |
| 3 Days | 3 Days | €9.21 |
| 4 Days | 4 Days | €12.07 |
| 5 Days | 5 Days | €15.31 |
| 6 Days | 6 Days | €18.55 |
| 7 Days | 7 Days | €21.79 |
| 8 Days | 8 Days | €23.41 |
| 9 Days | 9 Days | €25.84 |
| 10 Days | 10 Days | €27.46 |
| 11 Days | 11 Days | €29.89 |
| 12 Days | 12 Days | €32.32 |
| 13 Days | 13 Days | €33.94 |
| 14 Days | 14 Days | €35.56 |
| 15 Days | 15 Days | €37.99 |
| 16 Days | 16 Days | €39.61 |
| 17 Days | 17 Days | €40.42 |
| 18 Days | 18 Days | €42.04 |
| 19 Days | 19 Days | €44.47 |
| 20 Days | 20 Days | €46.09 |
| 21 Days | 21 Days | €47.71 |
| 22 Days | 22 Days | €48.52 |
| 23 Days | 23 Days | €49.33 |
| 24 Days | 24 Days | €50.14 |
| 25 Days | 25 Days | €50.95 |
| 26 Days | 26 Days | €51.76 |
| 27 Days | 27 Days | €52.57 |
| 28 Days | 28 Days | €53.38 |
| 29 Days | 29 Days | €54.19 |
| 30 Days | 30 Days | €55.81 |
Every plan works across the whole country, so the same eSIM that covers your Shinkansen ride also covers the city at each end. There is no separate "train plan" - it is one Japan eSIM for the entire trip, prepaid, data-only, delivered as a QR code instantly with no activation fee. If you want the full comparison of Japan plans and options, see our best eSIM for Japan guide.
What Coverage Is Actually Like at 300 km/h
Here is the realistic picture, corridor by corridor.
- Strong and steady: The urban and suburban stretches - leaving Tokyo Station, running through Yokohama, Nagoya, Kyoto, Shin-Osaka, and into Hiroshima and Hakata. These are dense network zones, and your eSIM holds a solid signal.
- Brief drops in tunnels: The Shinkansen goes through a lot of tunnels, especially in mountainous sections like the approach to Atami, the passes north on the Tohoku and Hokuriku lines, and the long bores near Shin-Kobe. Signal fades for anywhere from a few seconds to a minute or two, then snaps back. A video call may hiccup; a download resumes on its own.
- Rural gaps: Between cities, in valleys and rice-field stretches, you may drop from 5G to 4G or briefly lose data. It returns quickly. These gaps are short because the track hugs populated corridors.
The practical takeaway: the connection is very good for a moving train, but it is not tunnel-proof. Anything that must not be interrupted - a critical call, a live presentation - is safer scheduled at a station stop or for after you arrive.
The Tunnel Problem, and How to Work Around It
Tunnels are the one thing that genuinely interrupts you, and no provider or plan fixes physics. What you can do is work around them.
- Queue your work. Load the article, email thread, or document before you enter a mountain section, and it stays readable offline while you pass through.
- Let downloads resume. Cloud sync, email attachments, and podcast downloads pick up automatically after each tunnel. Start them early in the ride.
- Save the big calls for the platform. Station stops give you a rock-solid signal, though the fastest Nozomi services run long nonstop stretches - Shin-Yokohama to Nagoya is around 80 minutes without a stop - so the gaps between them can be longer than you expect. If you must take an important call, aim for a stop like Nagoya or Kyoto.
Before You Board: The Offline Checklist
The travelers who have the smoothest ride do a little prep. Five minutes at the station saves the whole trip:
- Download offline maps of your arrival city in Google Maps. GPS keeps working with no signal, so you can navigate out of the station the moment you step off.
- Save your ticket offline. If you booked through the online reservation systems (such as smartEX or EKINET), screenshot the QR or reservation details so a dead zone at the gate never traps you. A physical IC-linked or paper ticket is even safer.
- Preload entertainment. Netflix, Spotify, and YouTube all let you download in advance. Do it on hotel Wi-Fi the night before to save your data allowance and make tunnels irrelevant.
Getting Work Done Between Stops
The Shinkansen is one of the best mobile offices in the world if you set it up right. The ride is smooth, the seats have tray tables, and green cars have power outlets. With your eSIM providing the connection:
- Email and messaging run flawlessly the whole way, tunnels aside.
- Video calls on Zoom, Meet, or Teams work well on the urban stretches. Warn people you may drop for a moment in the mountains, and reconnection is automatic.
- Tethering a laptop works on the eSIM. A Tokyo-to-Osaka run is about 2.5 hours - enough to clear a real backlog. Watch your data balance, since hotspot use burns through gigabytes fast.
- Cloud work (Google Docs, Notion, Figma) syncs continuously and catches up after each gap.
Not sure how much data all this needs? Estimate it here:
For a week of city use plus a few Shinkansen rides with some tethering, most travelers land comfortably in the 5-10 GB range.
eSIM vs Pocket Wi-Fi vs Free Onboard Wi-Fi
eSIM vs Roaming vs Local SIM
Compare your options for Japan
| eSIMpass | Roaming | Local SIM | |
|---|---|---|---|
| Setup time | Instant | None | 30-60 min |
| Cost per GB | ~$2-5 | $10-50+ | ~$3-8 |
| Surprise fees | None | Likely | Unlikely |
| Buy before trip | Yes | Yes | No |
| Keep your number | Yes | Yes | No |
| Speed | 4G/5G | 4G/5G | 4G/5G |
A quick honest comparison of the three options people weigh for train travel:
- eSIM: Installed before you fly, connects instantly, rides the mobile networks, and covers your whole trip - train and city. Cheapest per GB and nothing to carry, charge, or return. Needs an eSIM-compatible phone.
- Pocket Wi-Fi: A real, decent option in Japan, especially for families sharing one device or older phones without eSIM support. It uses the same mobile networks, so on the train it behaves like your eSIM would. The downsides are honest ones: a daily rental fee, another battery to keep charged, and a device you must pick up and post back.
- Free onboard Wi-Fi: Free and everywhere on major lines, but slow, shared, and session-capped. Perfect as a backup, not as your main connection.
For most solo and couple travelers, the eSIM wins on price and simplicity. For a group all leaning on one connection, pocket Wi-Fi can make sense.
How to Set Up Your Japan eSIM (Under 3 Minutes)
- Purchase: Choose your Japan plan and check out.
- Receive: Your QR code arrives by email instantly.
- Scan: Open Settings, add the eSIM, and scan the code (see our setup and activation guide if you want screenshots).
- Activate: Turn on data roaming for the eSIM line and set it as your data line.
- Board: You are online the moment you sit down, from Tokyo Station to Hakata.
Pro tip: Install the eSIM at home on your own Wi-Fi before you fly. Installation needs internet; activation on arrival does not. Works the same on iPhone and Android.
A Note on Phone Calls
eSIMpass Japan plans are data-only, so they do not come with a Japanese phone number. For a train trip this rarely matters: keep your home SIM active for the odd call or SMS (dual-SIM phones run both at once), and use data apps like WhatsApp or LINE for everything else. LINE in particular is what people in Japan actually use, and it works perfectly over your eSIM data.
Frequently Asked Questions
Does an eSIM really work on a moving bullet train?
Yes. The eSIM connects to Japan's ground-based mobile networks, which blanket the Shinkansen corridors. You keep a strong signal on the urban and suburban stretches at full speed. The only interruptions are brief drops in tunnels, which reconnect automatically.
Why not just use the free Shinkansen Wi-Fi?
It is genuinely useful as a backup, but it is shared across the whole train, runs slow, and often caps sessions around 30 minutes. It handles a quick map check or message fine, but struggles with video calls or uploads. Your eSIM is the connection that carries real work; the free Wi-Fi is the safety net.
Will I lose signal in tunnels?
Briefly, yes. The Shinkansen passes through many tunnels, and data fades for a few seconds up to a minute or two before returning. No plan or provider avoids this. Queue your reading, let downloads resume on their own, and save critical calls for station stops.
How much data do I need for a Japan trip with train rides?
Light users doing maps and messaging manage on 3-5 GB a week. If you tether a laptop on the train or make video calls, plan for 5-10 GB. Use the calculator above for a personal estimate, and remember downloading video in advance on hotel Wi-Fi saves a lot.
Can I get a cheaper plan just for the train?
There is no train-only plan - one Japan eSIM covers your ride and both cities. If budget is the priority, our data plan guide helps you pick the smallest size, but the standard Japan plan is already low cost per GB and covers everything.
Should I pick eSIM or pocket Wi-Fi for the Shinkansen?
For solo and couple travelers, an eSIM is cheaper, installs before you leave home, and gives you nothing to carry or return. Pocket Wi-Fi makes more sense for groups sharing one device or phones without eSIM support. Both use the same networks, so on the train the speeds are similar.
Stay online from Tokyo to Osaka without the slow train Wi-Fi
Join 10,000+ travelers who chose eSIMpass. One Japan plan covers your Shinkansen ride and every city stop. Instant QR delivery, no activation fee.
Get Your Japan eSIM